vitepress 增加标签功能
主要是createContentLoader的使用
1. post.data.ts
先建一个数据文件: post.data.ts 这个就是读取 frontmatter 的内容,运行编译后会成为一个json数据体,供页面或者组件使用。
typescript
// docs\.vitepress\theme\post.data.ts
import { createContentLoader } from "vitepress";

interface Post {  // ts定义数据类型
  title: string;
  url: string;
  tags: [];
  created: DateInfo;
  updated: DateInfo;
}

interface DateInfo {  // ts定义数据类型
  time: number;
  string: string;
}

declare const data: Post[];
export { data };

export default createContentLoader(["../*/*/*.md"], {// 扫描文件的目录
  transform(raw): Post[] {

    return raw
      .map(({ url, frontmatter }) => {
        if (!frontmatter) {
          return null; // 忽略没有 frontmatter 的文件
        }

        const { title, created, updated } = frontmatter;
        const urlParts = url.split('/');

        return {
          title,
          url: '/vpblogs' + url,
          tags: frontmatter.tags || [],
          created: formatDate(created),
          updated: formatDate(updated),
          dir: `${urlParts[1]} / ${title}`,
        };
      })
      .filter((post): post is Post => post !== null && post.title !== null) // 过滤掉无效的条目
      ;
  },
});

function formatDate(raw: string): DateInfo {
  const date = new Date(raw);
  date.setUTCHours(12);
  return {
    time: +date,
    string: date.toLocaleDateString("en-US", {
      year: "numeric",
      month: "long",
      day: "numeric",
    }),
  };
}
2. TagsPage.vue
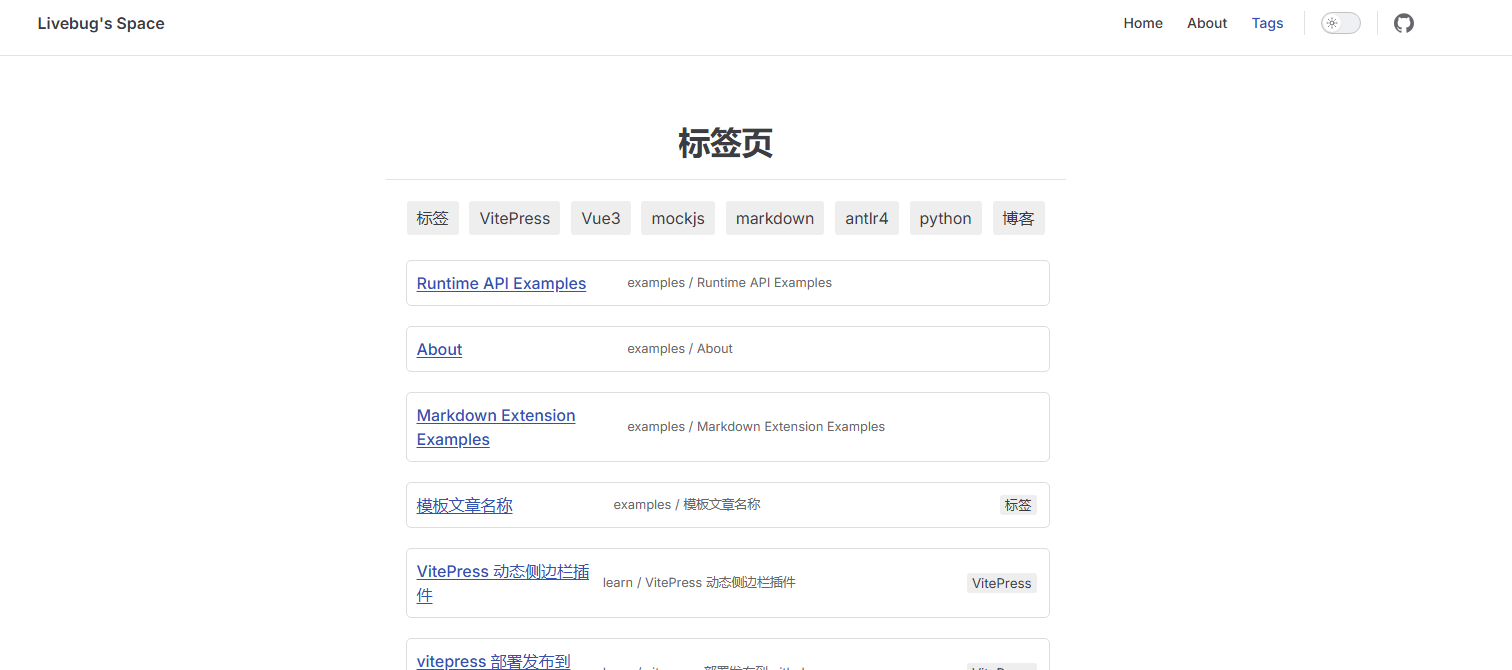
标签页面,就是一个点击筛选的作用;
增加组件之后别忘了在 index.ts 中增加组件配置
typescript
<template>
    <div class="container">
        <h1 style="text-align: center;">标签页</h1>
        <hr/>
        <div class="tags">
            <span v-for="tag in uniqueTags" :key="tag" @click="filterByTag(tag)" class="tag">
                {{ tag }}
            </span>
        </div>
        <div class="posts">
            <ul>
                <li v-for="post in filteredPosts" :key="post.url" class="post">
                    <div class="post-content">
                        <a :href="post.url" class="post-title">{{ post.title }}</a>
                        <small class="post-meta">{{ post.dir }}</small>
                        <div class="post-tags">
                            <span v-for="tag in post.tags" :key="tag" class="post-tag">
                                {{ tag }}
                            </span>
                        </div>
                    </div>
                </li>
            </ul>
        </div>
    </div>
</template>

<script setup>
import { computed, ref, onMounted } from 'vue';
import { useRoute } from 'vitepress';
import { data as postsData } from '../post.data';

const selectedTag = ref(null);
const route = useRoute();

onMounted(() => {
    const queryTag = new URLSearchParams(window.location.search);
    if (queryTag.get('tag')) {
        selectedTag.value = queryTag.get('tag');
    }
});

const uniqueTags = computed(() => {
    const tags = postsData.flatMap(post => post.tags);
    return [...new Set(tags)];
});

const filteredPosts = computed(() => {
    if (!selectedTag.value) {
        return postsData;
    }
    return postsData.filter(post => post.tags.includes(selectedTag.value));
});

function filterByTag(tag) {
    selectedTag.value = tag;
}
</script>

<style scoped>
.container {
    max-width: 1200px;
    margin: 0 auto;
    padding: 20px;
}

.tags {
    display: flex;
    flex-wrap: wrap;
    margin-bottom: 20px;
    padding: 0 1rem 0 1rem;
    justify-content: space-between;
}

.tag {
    background: #eee;
    border-radius: 3px;
    padding: 5px 10px;
    margin: 5px;
    cursor: pointer;
}

.tag:hover {
    background: #ddd;
}

.posts{
    padding: 0 1rem 0 0;
}
.posts .post {
    margin-bottom: 20px;
    list-style: none;
    padding: 10px;
    border: 1px solid #ddd;
    border-radius: 5px;
    transition: box-shadow 0.3s ease, background-color 0.3s ease;
}

.posts .post:hover {
    box-shadow: 0 4px 8px rgba(0, 0, 0, 0.1);
    background-color: #f9f9f9;
}

.post-content {
    display: flex;
    justify-content: space-between;
    align-items: center;
}

.post-title {
    flex: 1;
    margin-right: 10px;
}

.post-meta {
    flex: 2;
    font-size: 0.8em;
    color: #666;
    margin-right: 10px;
}

.post-tags {
    display: flex;
    flex-wrap: wrap;
}

.post-tag {
    background: #eee;
    border-radius: 3px;
    padding: 2px 5px;
    margin: 2px;
}
</style>
3. 页面配置
可以修改布局把组件加入到布局中作为标签云挂在右边;
本次采用的还是基本的,新建一个tags页面,把组件嵌入到页面。
4. 能改进的地方
- 可以增加文章头部的描述,这样文章列表卡片更丰富
- 可以在每个文章页面展示标签